
The HP LaserJet Printers and MFPs have a very nice free feature that allows you to send a print job to a LaserJet Printer or MFP and the print job will be stored on the machine until it is released using a PIN number. This feature is called Job Storage. It's completely free and built into just about every HP LaserJet Printer and MFP print driver.
Before we begin, let's be clear that this is a just simple print job storage and release mechanism. It is nowhere near as robust as a dedicated product such as HP Access Control, HP Secure Print, or PaperCut. It simply allows a user to send a print job to the LaserJet Printer or MFP and the print job will be stored until the user releases it using a PIN Number.
To enable Job Storage on your HP LaserJet Printer or MFP, do the following:
- Open the Windows Control Panel and double click on Devices and Printers.
- Right mouse click on the HP LaserJet Printer or MFP that you want to setup for Job Storage and choose Printing Preferences.
- On the Printing Preferences dialog box, click on the Job Storage tab.
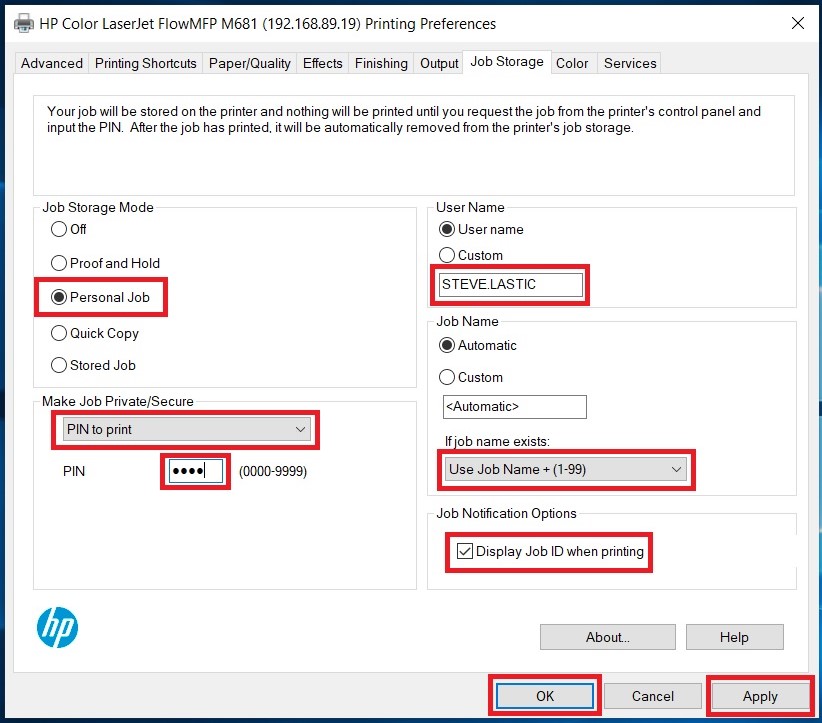
- Set the Job Storage Mode to Personal Job.
- Set the Make Job Private/Secure option to PIN to Print and enter in a 4 digit PIN number. This will be the PIN Number that you will use to release your print job.
- Set the User Name to your name. By default, the User Name is set to your Windows Login Name.
- Click Apply and then OK.
Now, whenever you print something to the LaserJet Printer or MFP, it will be stored until you walk over to the printer and release the print job using the PIN number that you setup in Step 5 above.
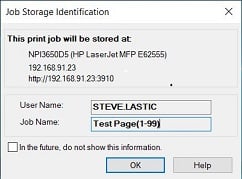
When something is printed to the LaserJet Printer or MFP that is setup for Job Storage, the user will receive the following Pop Up on their PC letting them know that the print job will be stored and the name of the print job. There is a check box to turn this off if the users does not want to see this every time they print something.
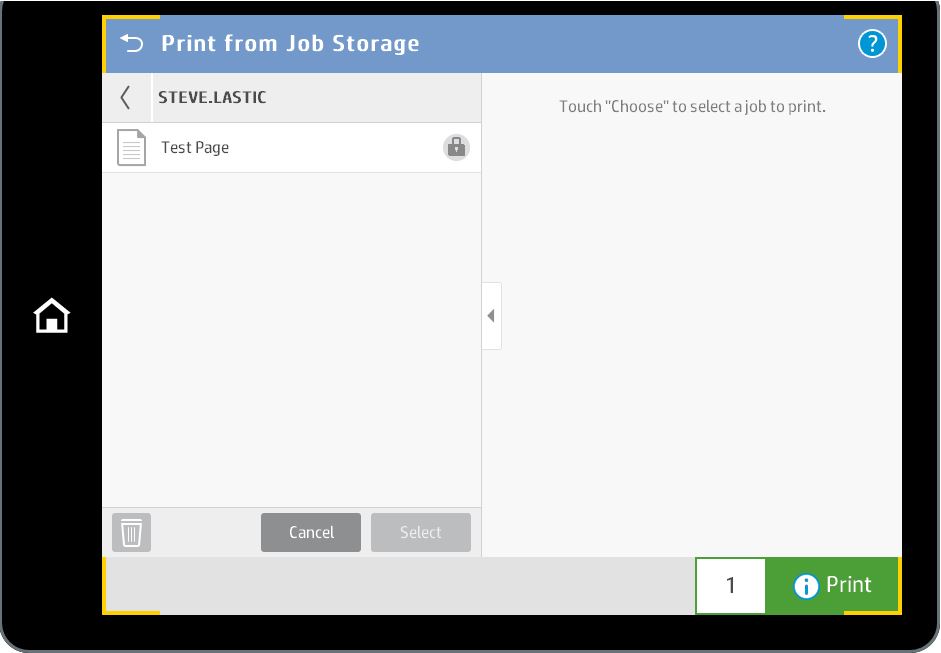
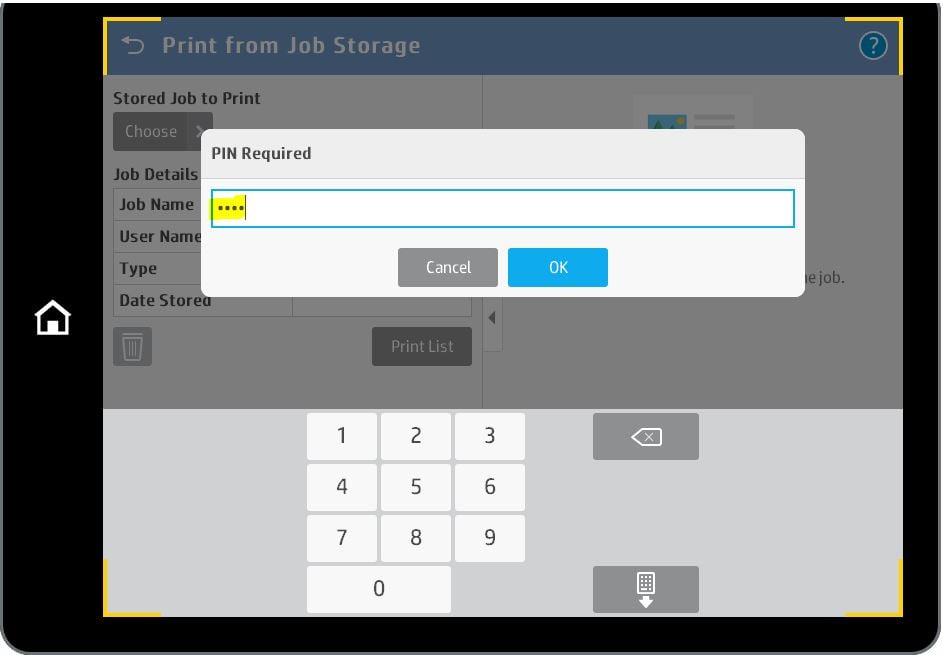
To release your print job, walk up to the machine, Select Print from the Control Panel menu and then choose Print from Job Storage. Click on your name or whatever name you used in Step 6 above and then select the print job that you wish to print. You will be prompted for your PIN Number. You can also delete a print job, release them all or release just a single print job. It's that simple.

To manage the print jobs stored on the HP LaserJets and MFPs, you can use the machine's embedded web server to set parameters such as how many jobs can be stored at one time or how long to keep a stored print job before automatically deleting it.
If you open the printer's web page and navigate to Security and the Protect Stored Data, you will see a section called Manage Stored Jobs at the bottom of the web page.
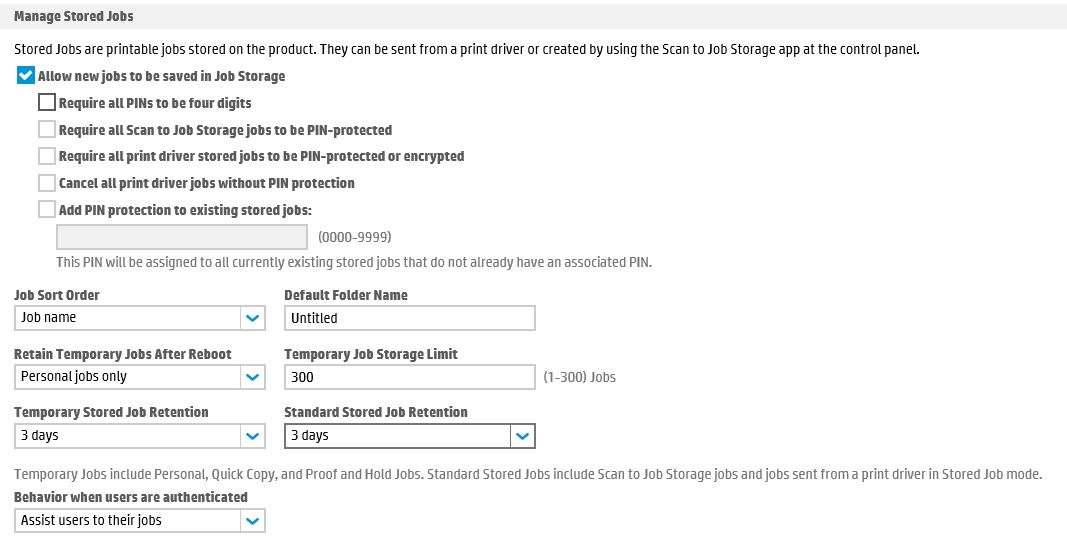
Under the Manage Job Storage section, some of the settings that you will want to change are:
- Whether all stored print jobs require a PIN number.
- Whether the print jobs are retained if the machine is rebooted.
- How many temporary print jobs can be stored.
- How many days to retain the print job before it is automatically deleted
If you have questions or need help with setting this up, simply contact Steve Lastic at TotalPrint USA. steve.lastic@totalprintusa.com
